DIY Tips: How to Replace Suzuki Parts at Home Like a Pro in 2025 step-by-step
Owning a Suzuki is great, but maintenance costs can add up quickly. Fortunately, many repairs and part replacements can be done at home with basic tools and a little guidance. This guide provides step-by-step instructions to replace Suzuki parts, saving you time and money while ensuring your vehicle remains in peak condition.
Essential Tools To Replace Suzuki Parts
Before starting any DIY repair on your Suzuki, having the right tools is crucial for efficiency, safety, and accuracy. Below are the essential tools every Suzuki owner should have in their garage to replace suzuki parts:
1. Basic Hand Tools
These tools are necessary for loosening, tightening, and removing various components:
- Wrenches – A set of combination wrenches (metric) will help you remove nuts and bolts of different sizes.
- Screwdrivers – A mix of flathead and Phillips screwdrivers for screws on interior and exterior components.
- Pliers – Useful for gripping and holding small components, cutting wires, and bending metal pieces.
- Socket Set & Ratchet Wrench – Essential for working on engine components, wheels, and suspension. Get both deep and shallow sockets for better accessibility.
- Allen Wrenches – Some Suzuki parts, such as certain engine components, require hex keys for removal.
2. Lifting Equipment
Many Suzuki repairs require lifting the car to access underbody components like brake pads, engine oil, and suspension. Always ensure proper lifting techniques to avoid accidents.
- Car Jack – A hydraulic floor jack is recommended for stability when lifting the vehicle.
- Jack Stands – Essential for keeping the car secure while you work underneath. Never rely only on a jack.
- Wheel Chocks – Prevents the car from rolling when lifted, enhancing safety.
3. Diagnostic Tools
Modern vehicles, including Suzuki models, come with onboard diagnostic systems that can indicate problems. These tools help identify issues before repairs and replace suzuki parts:
- OBD2 Scanner – Plugging this into your car’s OBD2 port will allow you to read and diagnose engine error codes.
- Multimeter – Used for checking electrical issues, including battery voltage, alternator performance, and fuse continuity.
- Compression Tester – Useful for checking engine health, especially when troubleshooting issues like misfires.
4. Protective Gear
Safety should always be a priority when working on your Suzuki.
- Mechanic Gloves – Protects your hands from burns, sharp edges, and chemicals.
- Safety Glasses – Prevents debris, dust, or chemicals from getting into your eyes.
- Work Mat or Creeper – A creeper (rolling board) makes working under the car more comfortable, while a thick mat prevents discomfort when kneeling.
- Fire Extinguisher – Always keep one nearby in case of fuel or electrical fires.
5. Specialized Tools (For Advanced Repairs)
For more complex Suzuki repairs, you may need:
- Torque Wrench – Ensures bolts are tightened to the correct specifications.
- Oil Filter Wrench – Makes oil changes easier by securely gripping the oil filter.
- Brake Bleeder Kit – Essential for flushing and refilling brake fluid.
- Bearing Puller – Helps remove wheel bearings without damaging surrounding components.
Having these tools on hand will make your DIY Suzuki repairs smoother, safer, and more efficient.
How to Identify the Right Suzuki Spare Parts
Choosing the correct replacement parts is critical for ensuring your Suzuki operates efficiently and safely. Using the wrong parts can cause mechanical failures, reduce performance, and even lead to accidents. Below is a complete guide on how to choose the right Suzuki spare parts.
1. OEM vs. Aftermarket Parts
OEM (Original Equipment Manufacturer) Parts
- Produced by Suzuki or its certified manufacturers
- Guaranteed to fit perfectly with your vehicle’s specifications
- Higher quality and durability than many aftermarket options
- Usually covered under a manufacturer’s warranty
- More expensive than aftermarket parts
Aftermarket Parts
- Manufactured by third-party companies
- More affordable than OEM parts
- Quality varies depending on the brand (Some are high quality, while others may wear out quickly)
- May require slight modifications to fit properly
- No Suzuki warranty, but some brands offer their own warranties
🔹 Pro Tip: If you want long-term reliability, go for OEM parts. If you’re on a budget, choose reputable aftermarket brands like Bosch, NGK, or Denso.
2. Compatibility Check: Ensuring the Right Fit
Before purchasing Suzuki spare parts, always verify that they are compatible with your vehicle model. Here’s how:
✔ Check Your Owner’s Manual – It lists compatible part numbers for most components.
✔ Find the Part Number on the Existing Component – Many Suzuki parts have a printed or engraved part number.
✔ Use Online Compatibility Tools – Websites like Suzuki’s official store and aftermarket sellers often have part lookup features where you can enter your car’s make, model, and year.
✔ Consult with a Mechanic or Parts Expert – If unsure, ask a professional for advice before purchasing.
3. Best Places to Buy Suzuki Spare Parts
Finding reliable place to replace Suzuki parts at a fair price is crucial. Here are the best sources for purchasing genuine and high-quality aftermarket parts:
1. Suzuki Official Store
- Best for: Genuine OEM Suzuki parts
- Why buy here? Direct manufacturer quality, official warranty, and guaranteed compatibility
- Where to buy? Suzuki dealerships or their official online store
2. PakWheels (Online Marketplace for Auto Parts)
- Best for: A mix of OEM and aftermarket parts
- Why buy here? Competitive pricing, user reviews for credibility, and a variety of options
3. Purchaser.com.pk
- Best for: Affordable and verified spare parts
- Why buy here? Trusted online marketplace with genuine parts and customer reviews
- Where to buy? www.purchaser.com.pk
🔹 Pro Tip: Always check customer reviews and seller ratings before purchasing auto parts online.
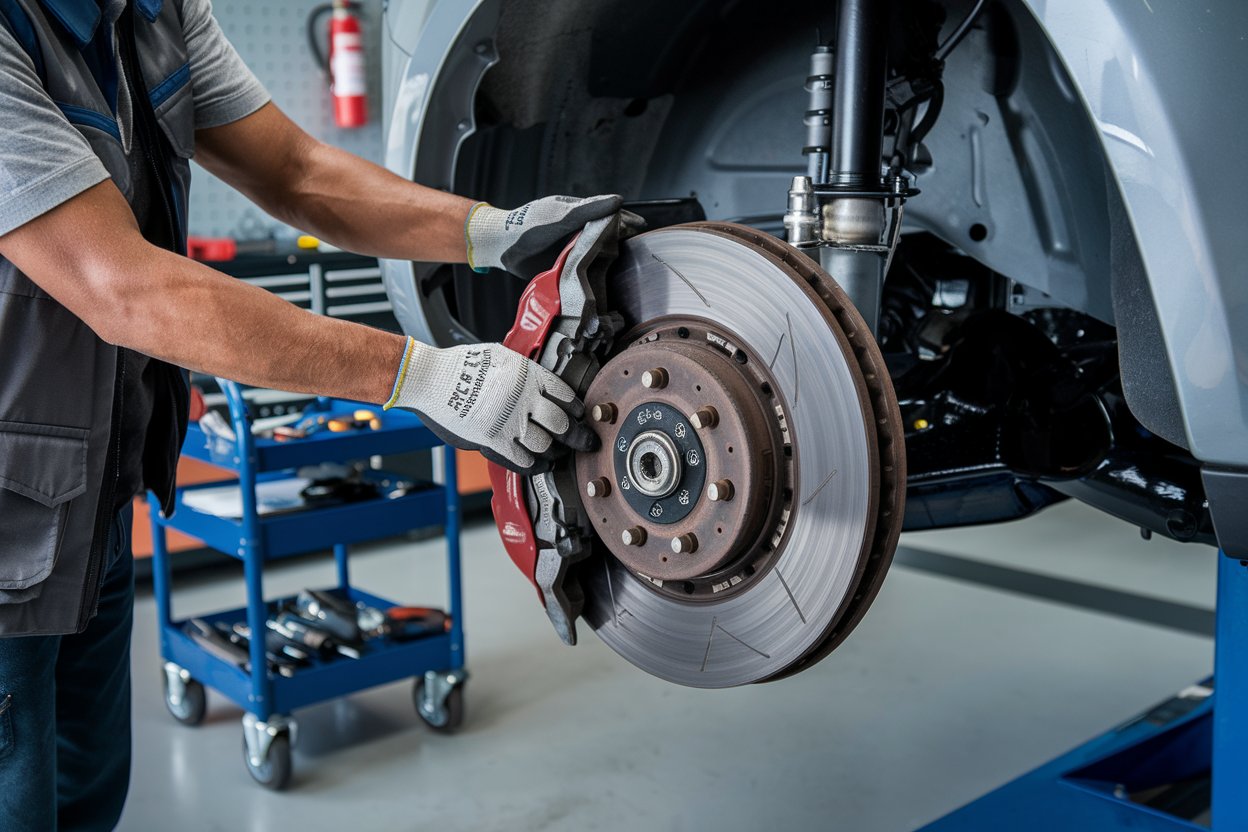
Step-by-Step Guide: Replacing Suzuki Brake Pads
Maintaining your Suzuki’s braking system is crucial for safety and performance. Here’s a simple guide to replacing your brake pads at home.
When to Replace Brake Pads?
Look out for these signs:
✔ Squeaking or grinding sounds when braking
✔ Soft or spongy brake pedal
✔ Vibrations when braking
✔ Longer stopping distance
🚨 Tip: If you notice any of these, replace your brake pads immediately to avoid further damage.
Tools & Materials Needed
🔧 Lug wrench – To remove wheel lug nuts
🛠 Socket wrench set – For caliper bolts
🛞 Car jack & jack stands – To lift the car safely
🔄 Brake caliper compressor tool – To push the piston back
🧼 Brake cleaner – To remove dust and debris
🧤 Safety gear – Gloves & safety glasses
Step-by-Step Instructions
1. Lift the Car & Remove the Wheel
1️⃣ Loosen the lug nuts before jacking up the car.
2️⃣ Lift the car using a jack and secure it with jack stands.
3️⃣ Remove the wheel completely.
2. Remove the Brake Caliper & Old Pads
1️⃣ Use a socket wrench to remove the caliper bolts.
2️⃣ Secure the caliper with a bungee cord (don’t let it hang by the brake line).
3️⃣ Slide out the old brake pads from the bracket.
🚨 Tip: Check the rotor for wear—if it’s damaged, consider replacing it.
3. Install the New Brake Pads
1️⃣ Apply brake grease to the back of the new pads (not on the friction surface).
2️⃣ Insert new pads into the caliper bracket.
4. Retract the Caliper Piston
1️⃣ Use a C-clamp or brake caliper compressor to push the piston back.
2️⃣ Ensure it moves smoothly to avoid braking issues.
5. Reattach the Brake Caliper
1️⃣ Position the caliper over the new pads.
2️⃣ Tighten the caliper bolts securely.
6. Reinstall the Wheel & Test the Brakes
1️⃣ Put the wheel back on and hand-tighten the lug nuts.
2️⃣ Lower the car and fully tighten the lug nuts in a crisscross pattern.
3️⃣ Pump the brake pedal until firm before driving.
🚨 Tip: Test the brakes at low speed before normal driving.
Step-by-Step Guide: Changing Suzuki Air Filters
When to Replace Air Filters
- Reduced fuel efficiency
- Decreased acceleration
Replacement Steps
- Locate the Air Filter Housing – Usually near the engine bay.
- Open the Housing – Use a screwdriver to remove clips.
- Remove Old Filter – Lift it out and inspect for dirt.
- Install New Filter – Place it securely and close the housing.
Step-by-Step Guide: Replacing Suzuki Engine Oil and Filter
When to Change Oil
- Every 5,000-7,000 km
- Engine runs rough
Replacement Steps
- Lift the Car – Use a jack for better access.
- Drain Old Oil – Unscrew the drain plug and let oil flow out.
- Remove the Old Filter – Unscrew it using an oil filter wrench.
- Install New Filter – Apply oil to the gasket and screw it in.
- Refill Oil – Pour fresh oil and check the dipstick.
Step-by-Step Guide: Replacing Suzuki Spark Plugs
When to Replace Spark Plugs
- Engine misfires
- Reduced fuel efficiency
Replacement Steps
- Locate Spark Plugs – Under the ignition coils.
- Remove Ignition Coils – Unscrew and pull them out.
- Take Out Old Plugs – Use a socket wrench to remove them.
- Install New Plugs – Tighten to the correct torque.
- Reinstall Coils – Secure back in place.
Step-by-Step Guide: Changing Suzuki Car Battery
When to Replace the Battery
- Car won’t start
- Dim headlights
Replacement Steps
- Turn Off the Car – Ensure safety.
- Disconnect Terminals – Start with the negative cable.
- Remove the Battery – Lift it out carefully.
- Install New Battery – Secure it in place and reconnect terminals.
FAQs on Replace suzuki Parts
Conclusion
To replace Suzuki parts at home isn’t just cost-effective—it’s empowering! By following this guide, you can confidently maintain your vehicle while saving money. So grab your tools and start your DIY journey today!


