Best Secrets to Professional Car Detailing Results in 2025
Car detailing is an intricate and rewarding process that goes far beyond a simple car wash. It is an art and science designed to restore and preserve your vehicle’s aesthetic appeal while protecting it from wear and tear. Whether you’re a car enthusiast or someone looking to maintain your vehicle’s value, learning professional detailing techniques can take your results to the next level.
Introduction

Car detailing is more than a cleaning routine; it’s about maintaining your car’s condition as close to new as possible. Detailing enhances not only your car’s appearance but also its longevity and resale value. From a deep clean to paint protection, every step of car detailing is meticulously designed to bring out the best in your vehicle.
Car Detailing vs. Regular Washing
What Is Regular Washing?
Regular car washing involves cleaning the exterior to remove dirt, grime, and surface contaminants. This is a routine process to maintain cleanliness but doesn’t delve into deeper restoration.
What Makes Car Detailing Different?
Detailing takes it further with a focus on restoring and protecting the car. It involves:
- Deep cleaning: Removing contaminants not visible to the naked eye.
- Polishing: Enhancing the paint’s clarity and gloss.
- Protection: Applying wax, sealants, or ceramic coatings.
- Interior care: Thorough cleaning and treatment of seats, carpets, and trim.
 Car Wash |
 Car Detailing |
|
|---|---|---|
| Benefits | Protects Paintwork | Protects paint and surfaces. |
| Benefits | Enhance Appearance | Enhances resale value. |
| Benefits | Improved Safety | Extends the lifespan of materials. |
| Benefits | Improves driving experience with a clean interior. |
Tools and Products Needed
Investing in quality tools and products is the first step to professional results. Here’s a breakdown of essentials:
1. Cleaning Tools:
- Buckets: Two for the two-bucket washing method.
- Microfiber towels: Scratch-free drying and buffing.
- Wash mitts: Soft and gentle on paint.
- Brushes: For intricate areas like wheels and vents.
2.Cleaning Products:
- pH-balanced car shampoo: Safe for paint and finishes.
- Clay bar: Removes bonded contaminants.
- All-purpose cleaner: Versatile for various surfaces.
3.Polishing and Protection:
- Dual-action polisher: Reduces swirl marks and enhances shine.
- Polishing pads: Different levels of abrasiveness for correction.
- Wax or sealant: Adds gloss and protection.
Preparing for Detailing
Choose the Right Environment:
- Work in a shaded area to avoid water spots.
- Ensure adequate ventilation when using products.
Prepping the Car:
- Remove personal items from the interior.
- Rinse the car to remove loose dirt.
- Use a pre-wash solution or foam cannon for heavy grime.
Expanded Exterior Detailing Steps
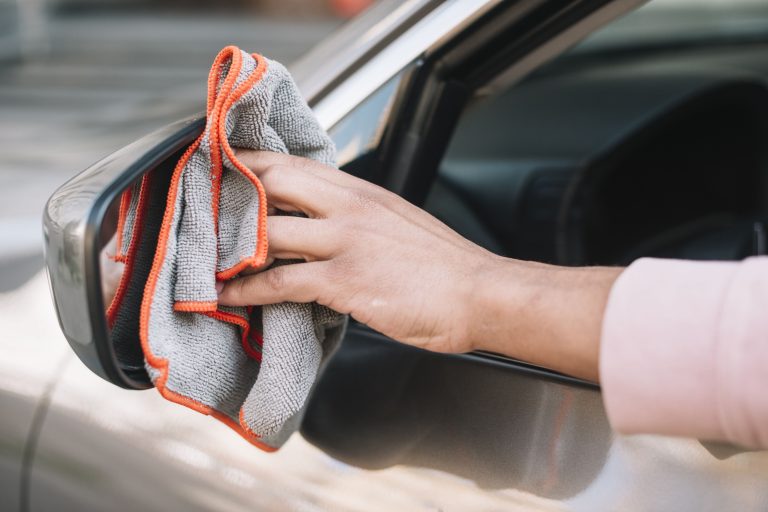
Step 1: Washing

The first step in exterior detailing is thoroughly washing the vehicle to remove dirt, dust, and grime from its surface. This step lays the foundation for all subsequent processes.
- Two-Bucket Method:
Use two separate buckets to ensure optimal cleaning. One bucket contains soapy water for washing, while the other is filled with clean water for rinsing the wash mitt. This prevents dirt from being reapplied to the vehicle’s surface, reducing the risk of scratches. - High-Quality Products:
Use a pH-balanced car shampoo to maintain the paint’s integrity. Avoid dish soap or other household detergents, as they can strip protective layers like wax or sealant. - Washing Technique:
Start at the top of the car and work your way down, as the lower sections are usually the dirtiest. Use gentle, straight-line motions to minimize the formation of swirl marks. - Rinsing:
After washing, rinse the car thoroughly using a pressure washer or garden hose. Ensure no soap residue is left behind, as this can lead to water spots or streaks.
Step 2: Claying

Claying is a critical step for removing deeply embedded contaminants that regular washing can’t eliminate.
- Purpose:
Contaminants like tree sap, tar, brake dust, and industrial fallout bond with the paint over time, making the surface rough. A clay bar pulls these impurities out, leaving a smooth and clean finish. - Procedure:
- Spray a clay lubricant generously onto a small section of the car.
- Glide the clay bar gently over the lubricated surface in straight motions. Avoid applying too much pressure.
- Fold and knead the clay regularly to expose a clean side as it picks up dirt.
- Inspection:
Run your hand over the paint after claying. If the surface feels smooth like glass, the process is complete.
Step 3: Polishing

Polishing revives the car’s paint by removing minor imperfections like swirl marks, scratches, and oxidation, restoring its original clarity and shine.
- Types of Polish:
Choose a polish appropriate for your car’s condition. Use a mild polish for light imperfections or a compound for more severe issues. - Equipment:
A dual-action (DA) polisher is recommended for even application and professional results. It oscillates and rotates simultaneously, reducing the risk of paint damage. - Technique:
- Apply a small amount of polish to the polisher’s pad.
- Work in 2×2-foot sections to ensure thorough coverage.
- Move the polisher in overlapping passes, using a slow and steady pace. Avoid staying in one spot for too long.
- Wipe away the residue with a microfiber towel to reveal the results.
Step 4: Sealing and Waxing

This step protects the polished surface and enhances the car’s appearance with a deep, glossy finish.
- Sealing:
Sealants provide a durable protective layer against UV rays, water spots, and contaminants.- Apply a small amount of sealant to an applicator pad.
- Spread it thinly and evenly across the surface.
- Let it cure for the recommended time, then buff it off with a clean microfiber cloth.
- Waxing:
Wax adds a rich, glossy look to the paint and offers an additional layer of protection.- Use either paste or liquid wax, depending on your preference.
- Apply the wax in a circular motion using an applicator pad.
- Allow it to haze over, then buff it off with a microfiber towel for a brilliant shine.
- Pro Tip:
For maximum results, reapply wax every 6-8 weeks, depending on your driving conditions and climate.
Interior Detailing Steps
Vacuuming:
Use a vacuum cleaner with attachments to reach under seats and crevices.
Upholstery Cleaning:
- Use fabric cleaners for cloth seats.
- Condition leather seats with specialized products to prevent cracking.
Dashboard and Trim Care:
Apply protectants to prevent fading and maintain a new look.
Window Cleaning:
Use ammonia-free glass cleaners for streak-free clarity.
Wheels and Tires Detailing
Cleaning Wheels:
- Use a dedicated wheel cleaner to remove brake dust.
- Use a soft brush to scrub between spokes.
Tire Shine:
Finish by applying a tire dressing to restore the black, glossy finish.
Advanced Paint Correction
Paint correction removes visible imperfections and rejuvenates the car’s appearance. Follow these steps:
- Use a clay bar to prep the surface.
- Apply a compound with a dual-action polisher for heavy correction.
- Finish with a fine polish for a mirror-like shine.
Protecting Your Work
Waxing vs. Sealants vs. Ceramic Coatings:
- Wax: Enhances gloss and offers temporary protection.
- Sealant: Provides long-lasting protection (up to 6 months).
- Ceramic Coatings: Forms a durable, hydrophobic layer for years of protection.
Maintenance Tips
- Wash weekly to prevent buildup.
- Apply quick detailers for in-between touch-ups.
- Use car covers to protect from dust and UV rays.
Common Mistakes to Avoid
- Skipping the clay bar: Leaves behind contaminants that affect polishing.
- Overusing polish: Can thin the paint.
- Using household cleaners: May damage surfaces.
FAQs
Conclusion
Car detailing is a blend of science, art, and technique. By investing in quality tools, mastering the right methods, and maintaining a consistent routine, you can achieve a professional-level finish at home. Whether it’s the sparkling exterior, a clean interior, or protected wheels, the effort you put into detailing will not only make your car look amazing but also preserve its value for years to come.